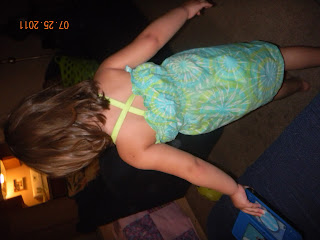
I made this simple dress with 30"x20" its for a 3t to 4 t cause my daughter is a big baby:-). That and a few inches of bias tape. If you want to learn how, continue reading.
I started by measuring around her chest (20") i added 10". then measured from around where i wanted the dress to start at the chest to where i wanted in to end and added 2 inches for hem.
this above is my already cut fabric.
Folded the top and bottom about 1/4 inch and pressed it with my fingers and then folded again and finger pressed again
Now i sewed both ends separately creating the top and bottom hem of the dress.
Now i went ahead and changed the bobbins tread to stretch tread. As my stretch tread is black i turned around my fabric putting the right side up of the fabric so the tread visible when worn is the one that matches not my stretchy tread.
I began shirring 1/4" under the seem.
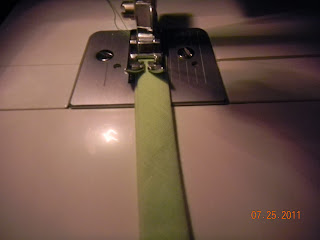
i dont cut my tread every time i get to the end i just put the machine foot up turn around the fabric move it 1/4" again , foot down and continue shirring. i dont measure my 1/4 inch i just go by the press foot , you can see in the above pic, that the last sewn row is right on the border of the pressed foot.
After i made 4 or 5 shirred rows on the top part of the dress i left about 3" away and shirred 3 more rows.
Now we should have all the shirring done., Therefore we change our bobbing back to all purpose tread.
Now i sewed along the side of the dressed wrong side together. ↖
I cut the extra fabric on the other side of the seem. and turn the dress inside out.
Now we will sew again 1/4 inch on that same side making a clean inside seem.
Then i measured front to back where i wanted the straps, cut the pieces of bias tape, sewed them so they wouldn't open apart and attached them.
I hope you guys enjoyed my little tutorial. any questions feel free to post them and i will make my best to answer them as best and fast as possible. Thank you.
PS I will later tonight try to explain how to shirr but for now i will tell you that for the final effect you should spray with water the area and iron . That will cause the shirred area to shrink and give it that look.


Very cute!!! She looks so happy and comfy in it!!!
ReplyDeleteYou are becoming a great seamstress... keep it up!!! :-)